Athabasca University | AU Student/Staff Login | Invited Guest Login

Circuit 5B: Remote-Controlled Robot - Unleashing Robotic Mobility
Circuit 5B: Remote-Controlled Robot - Unleashing Robotic Mobility
Circuit 5B: Remote-Controlled Robot - Unleashing Robotic Mobility
In Circuit 5B, the world of robotics expands as you delve into remote-controlled capabilities. This project involves using a motor driver to exert precise control over the speed and direction of two motors, creating a versatile and responsive robot. Additionally, you'll learn the intricacies of processing multiple pieces of information from a single serial command via the Serial Monitor.
New Concepts:
ASCII Characters:
ASCII (American Standard Code for Information Interchange) is a character encoding standard that assigns numerical values to characters. In this experiment, characters sent to the Serial Monitor are interpreted by the microcontroller as specific numbers, enabling remote control.
Converting Strings to Integers:
String variables, holding sequences of characters, can be converted to integers using Arduino's built-in methods. The .toInt() method, in particular, facilitates the conversion of string variables to numeric values.
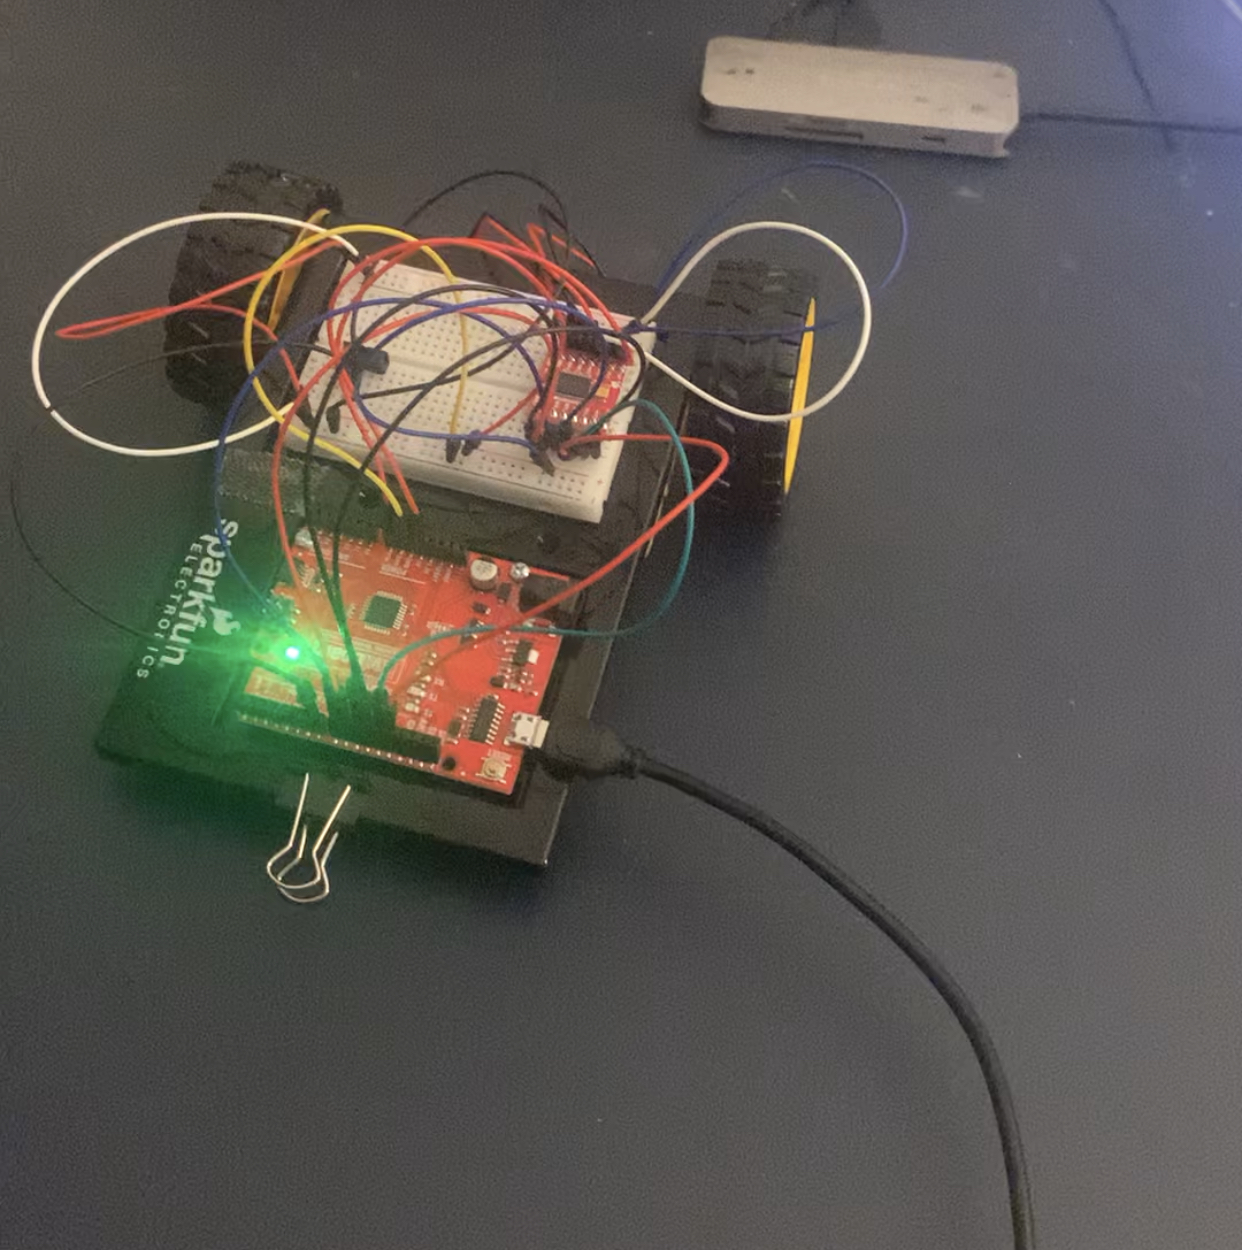
Hardware Assembly:
Robot Assembly:
Customize the breadboard baseplate to emulate a robot structure.
Attach Dual Lock strips to the corners of the baseplate and motors, ensuring the latter are mirror images of each other for balanced movement.
Attach wheels to the motors, aligning the flat side of the shaft with the wheel coupler.
Add a binder clip at the back end of the robot, acting as a caster for smooth navigation.
Hardware Hookup:
Connect components as per the circuit diagram and the provided hookup table.
Special attention is required for polarized components to ensure correct orientation.
Programming Overview:
The Arduino code facilitates remote control of the robot via the Serial Monitor.
Commands are sent to the RedBoard, specifying the direction ("f" for forward, "b" for backward, "r" for right, "l" for left) and the distance.
The robot responds by controlling the motors accordingly, achieving movement or turns as instructed.
Coding Challenges:
Button Integration:
Replace the switch with a button to activate the robot's motion only when the button is pressed.
Sensor Activation:
Modify the code to activate the robot using a sensor, such as a photoresistor, adding an element of automation.
Troubleshooting Tips:
Verify motor driver wiring to address motor-related issues, as multiple connections can be prone to errors.
Ensure correct switch connections to avoid issues with the on-off control mechanism.
If problems persist, consider the integrity of jumper wires, as bending can lead to wire degradation.
Observations:
Upon successful setup and code upload, the robot responds to commands entered into the Serial Monitor.
Directional commands ("f," "b," "r," "l") and distance inputs trigger precise movements or turns, showcasing the robot's responsiveness.
Conclusion:
Circuit 5B expands your understanding of robotics, offering hands-on experience in remote-controlled motion.
ASCII characters and string-to-integer conversion enrich your coding repertoire, enhancing your ability to process diverse information.
The project's interactive nature, coupled with hardware and software integration, marks a significant step in mastering robotic control systems.
Exploring coding challenges opens avenues for further customization and automation, laying the groundwork for more advanced robotics projects.
- Assignment 2 Weblog

October 2, 2023 - 5:57am
Victor Okpube - Motor Basics

November 1, 2023 - 12:03am
Victor Okpube - Circuit 5C: Autonomous Robot
November 1, 2023 - 12:10am
Victor Okpube - Circuit 5C: Autonomous Robot
November 1, 2023 - 12:18am
Victor Okpube
Comments
Victor,
In your video the robit moved around a fair amount, did you program it with a specific set of instructions of were you typing the directions off to the side? When I built mine i did everything throught he serial monitor. But if seems like you found a way to program it through preset conditions?
James